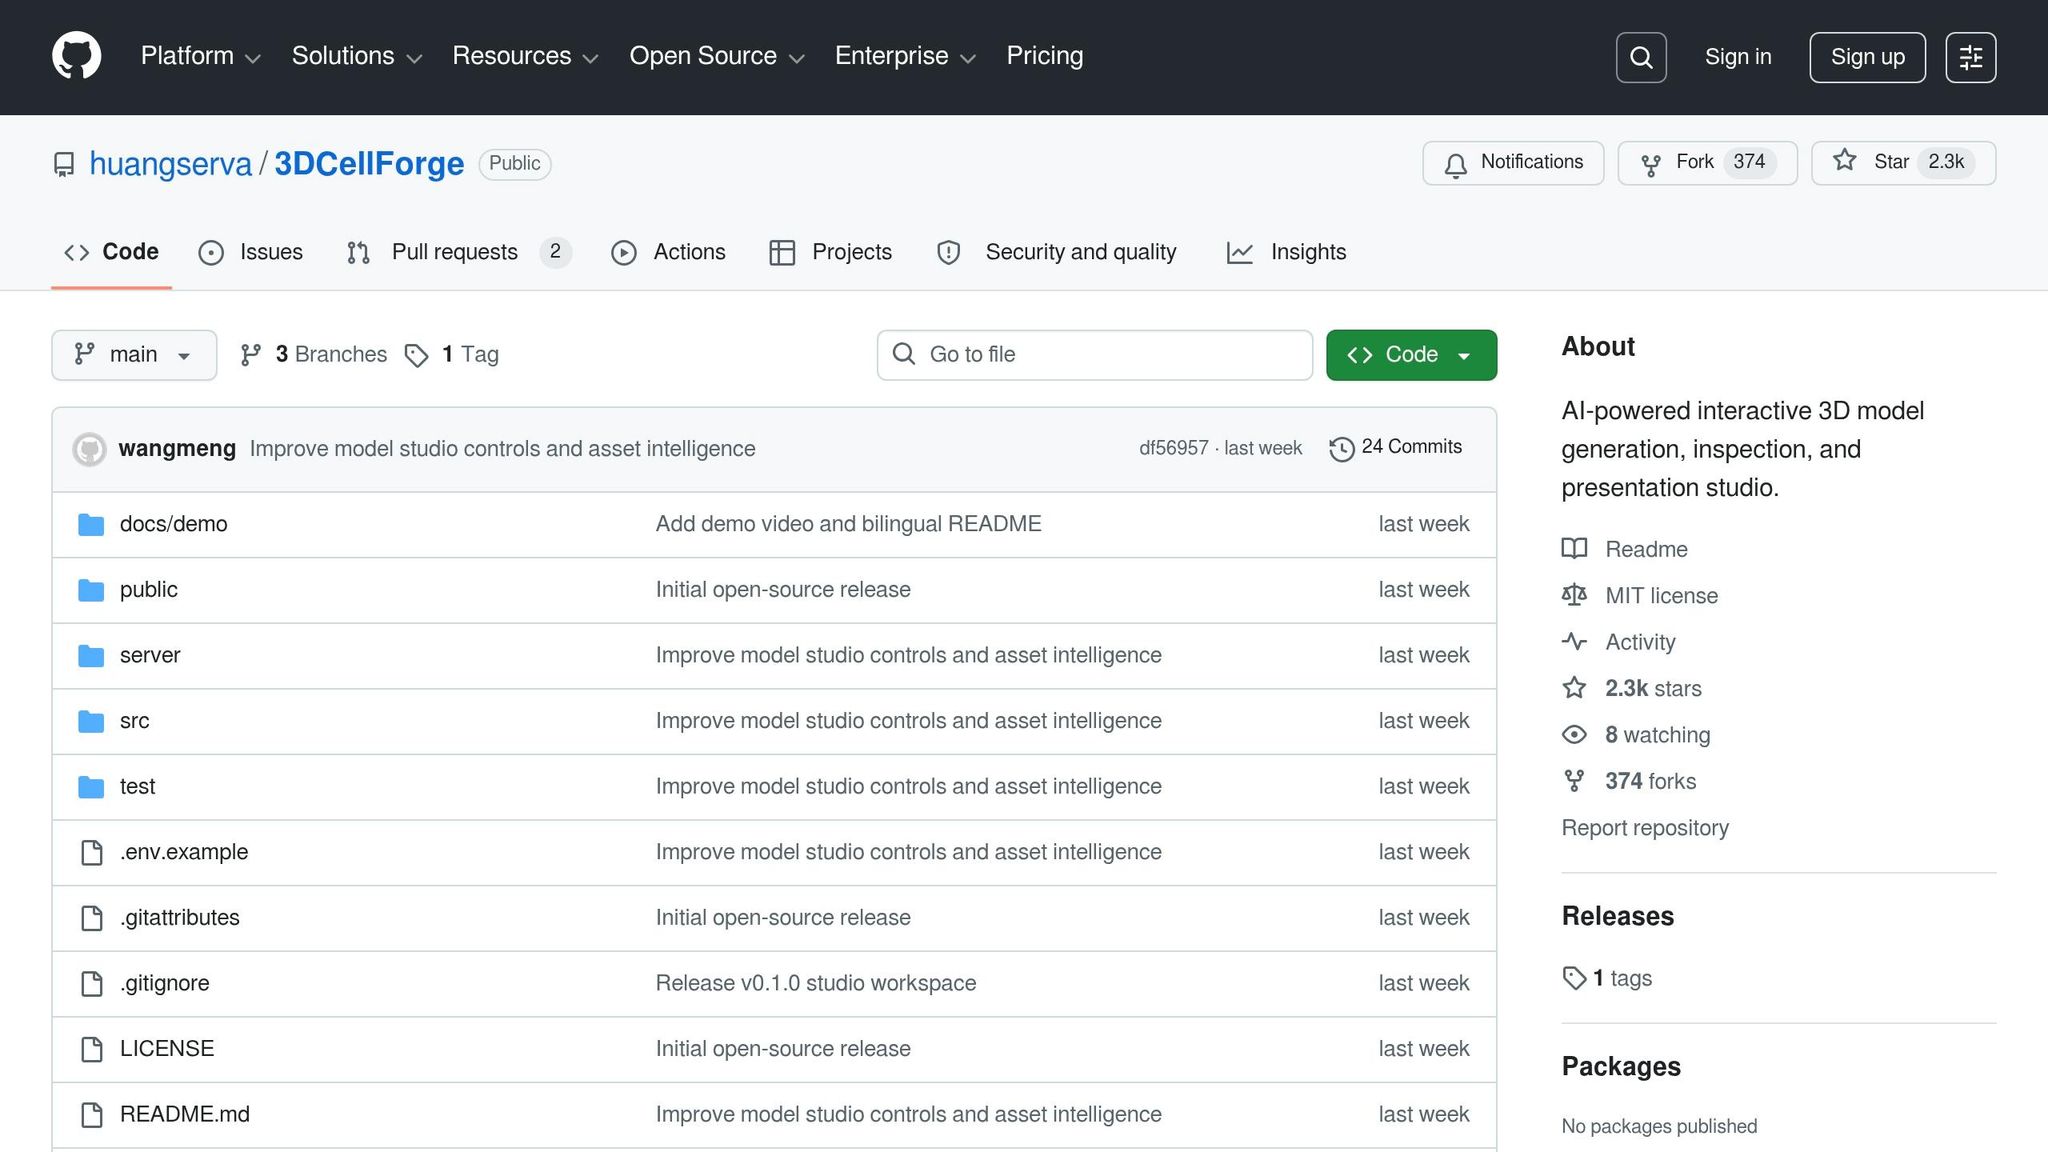
3DCellForge: The Open-Source AI 3D Generation Studio Trending at 1.8K Stars - https://github.com/huangserva/3DCellForge

I first stumbled across 3DCellForge while trying to speed up prototyping for a product showcase. My workflow was bogged down by endless manual tweaking in Blender, and I needed something that could churn out usable GLB files from reference images without the back-and-forth. Enter 3DCellForge, a browser-based studio that promises to turn 2D inputs into interactive 3D environments using AI-powered backends like Hyper3D and Fal.ai.
The pitch is simple: no installs, no subscriptions, and a clean React-based interface that runs entirely in your browser. But with 1.8K GitHub stars and a growing number of forks, I wanted to see if the hype held up. Can this tool actually handle the demands of designers, developers, and educators, or does it buckle under the weight of its cloud dependencies? This post breaks down the good, the bad, and whether 3DCellForge is worth your time.
Image to 3D World Workflow 👀
Core Features and Technical Architecture
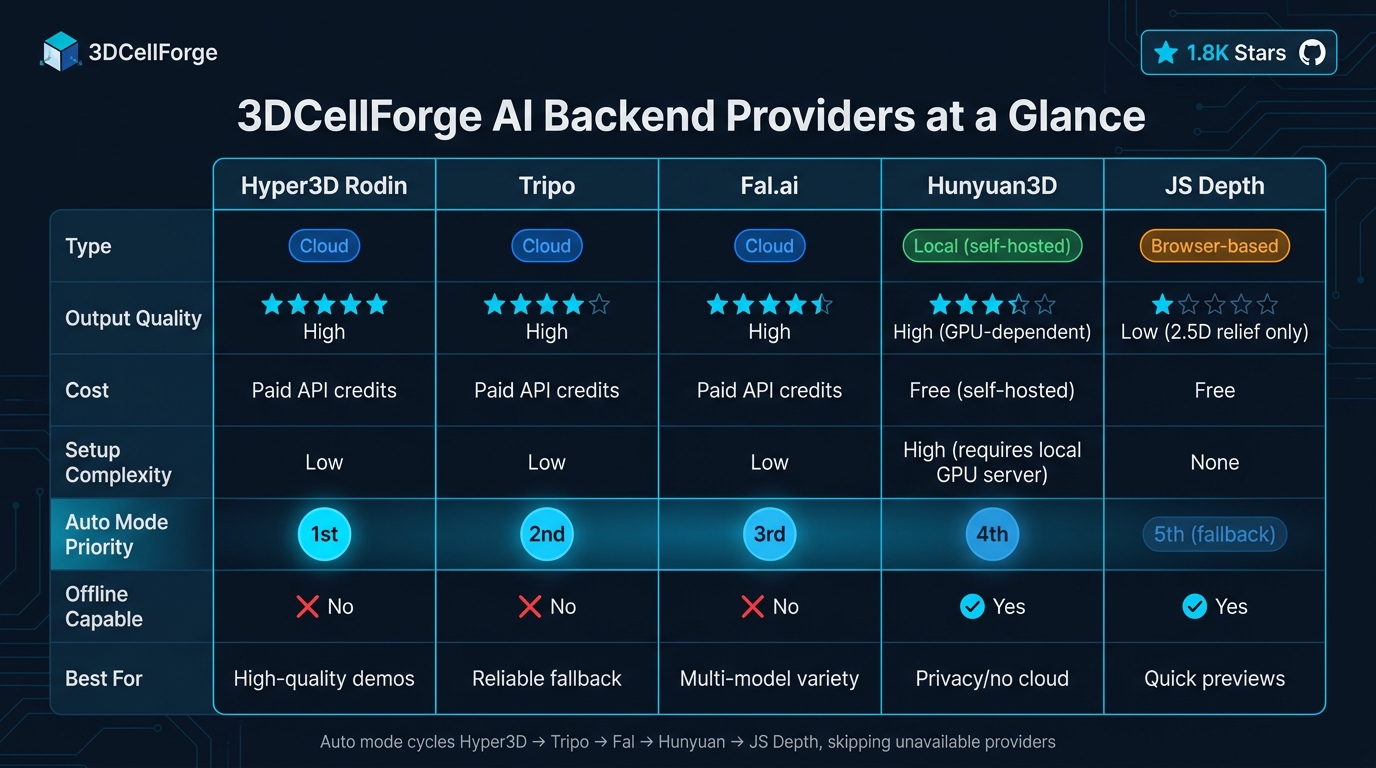
3DCellForge AI Backend Providers: Feature & Capability Comparison
Key Features of 3DCellForge
At its core, 3DCellForge stands out for its multi-provider AI pipeline. The platform doesn’t tie you to a single backend but instead works with multiple image-to-3D generation services, including Hyper3D (Rodin), Tripo, Fal.ai, Hunyuan3D, and a browser-based JS Depth relief mode. In its "Auto" mode, the system cycles through these backends sequentially, ensuring that if one, like Hyper3D, fails, the next option is automatically triggered.
The tool also includes an object-aware inspector paired with an automated quality scoring system. When you upload or generate a GLB model, the inspector categorizes the asset and evaluates its quality based on metrics like file size, triangle count, and texture count. This scoring system helps determine if a model is ready for demonstration purposes, with low scores often pointing to source image issues rather than backend performance.
For showcasing assets, Demo Mode simplifies the process by hiding unnecessary UI elements and activating cinematic camera paths tailored to specific asset types. As of May 2026, the system offers six distinct cinematic path categories, significantly reducing the effort required for manual camera adjustments.
These features combine to create a streamlined workflow for designers and developers, leveraging the multi-provider pipeline and automated inspection tools to efficiently generate and refine 3D assets. The technical details behind these capabilities are explained in the next section.
Technical Stack Overview
3DCellForge operates on a two-layer architecture. The frontend leverages React and Vite for its UI, with Three.js and React Three Fiber managing the WebGL rendering. Drei provides orbit controls and utility functions, while Framer Motion handles smooth UI transitions. On the backend, a single Node.js file (server.mjs) manages API proxying, multipart uploads, task polling, and GLB file caching.
| Layer | Technology | Role |
|---|---|---|
| Frontend | React, Vite, Framer Motion | UI components, bundling, and transitions |
| 3D Rendering | Three.js, React Three Fiber, Drei | WebGL stage management and orbit controls |
| Backend | Node.js (server.mjs) | API proxying, caching, and task-status polling |
| Storage | IndexedDB, localStorage | Asset library and session state persistence |
| AI Services | Tripo, Fal.ai, Hyper3D, OpenAI | Image-to-3D generation and vision-based analysis |
| Testing | Playwright | Visual regression and layout testing |
An optional OpenAI vision integration is available at the /api/3d/analyze endpoint. This feature classifies uploaded images into asset types and generates optimized prompts, which can be particularly helpful for ambiguous inputs. API keys are stored securely in a .env.local file, keeping them server-side.
Strengths and Limitations
One of the tool's strengths lies in its hybrid storage model. IndexedDB ensures that model metadata persists across page refreshes, while the Node.js backend caches GLB files in the public/generated-models/ directory. This setup minimizes unnecessary API calls, saving credits during iterative demo sessions.
However, there are trade-offs. The reliance on external cloud services like Tripo, Fal.ai, and Hyper3D Rodin introduces potential workflow disruptions during service outages and adds usage costs. While the local Hunyuan3D option eliminates cloud dependencies, it requires hosting your own API server, which can be resource-intensive on consumer-grade hardware. The JS Depth mode, while free and instantaneous, only generates 2.5D image reliefs rather than full 3D geometry, making it a less robust fallback.
The codebase itself - composed of roughly 75% JavaScript and 24.9% CSS - makes it accessible for web developers to contribute. However, being a WebGL-based tool, it faces performance limitations. Complex scenes with high triangle counts can strain the GPU more than native applications typically would.
Installing and Configuring 3DCellForge
System Requirements
3DCellForge operates as a web application supported by a Node.js backend, which keeps hardware demands relatively light for a 3D tool - except in one critical area. Here's a breakdown of the minimum and recommended requirements:
| Component | Minimum | Recommended |
|---|---|---|
| Operating System | Windows, macOS, or Linux (64-bit) | Modern 64-bit OS, fully updated |
| Runtime | Node.js (latest LTS) + npm | Node.js LTS with npm |
| Graphics | WebGL-compatible GPU | Dedicated GPU (needed for local AI generation) |
| Browser | Chrome, Firefox, Edge, or Safari | Latest Chrome or Edge |
| Network | Internet access for cloud APIs | High-speed connection for GLB downloads |
| Local AI Backend | Optional | Local Hunyuan3D API server |
WebGL support is non-negotiable since rendering relies on Three.js and React Three Fiber. If you plan to use the local Hunyuan3D backend instead of cloud APIs, a dedicated GPU is a must - integrated graphics often can't handle the load effectively.
Once you've ensured your system meets these requirements, you can move on to cloning and running the project.
Cloning and Running the Project
The project uses a standard Node.js setup with a two-process architecture for the backend and frontend. Follow these steps:
-
Clone the repository and install dependencies:
git clone https://github.com/huangserva/3DCellForge.git cd 3DCellForge npm install -
Set up your environment:
Opencp .env.example .env.local.env.localand add your API keys. This file is ignored by Git to keep your credentials secure. -
Run the backend and frontend in separate terminals:
The backend will run at# Terminal 1 - Start the Node backend npm run dev:api # Terminal 2 - Start the Vite frontend npm run devhttp://127.0.0.1:8787. Open the Vite URL provided in the terminal output. To confirm everything is working, run:
This command verifies the rendering pipeline.npm run test:visual
Configuring AI Integrations
AI provider keys are stored in the .env.local file, each corresponding to a specific backend. Here's how they're mapped:
| Environment Variable | Provider | Type |
|---|---|---|
TRIPO_API_KEY |
Tripo | Cloud |
FAL_API_KEY |
Fal.ai (TRELLIS, TripoSR, Hunyuan3D v2) | Cloud |
RODIN_API_KEY |
Hyper3D Rodin | Cloud |
OPENAI_API_KEY |
OpenAI vision analysis (/api/3d/analyze) |
Cloud |
HUNYUAN_API_BASE |
Local Hunyuan3D server | Local |
API_HOST |
Backend host address | Config |
Start by adding one cloud-based key (e.g., TRIPO_API_KEY or FAL_API_KEY) and test the pipeline. The system's Auto mode rotates through available keys.
For local AI processing, set HUNYUAN_API_BASE to the address of your local server, such as http://127.0.0.1:8081. Before starting the 3DCellForge backend, confirm that the server's /send and /status/:uid endpoints are operational. If these endpoints are missing, the system will silently skip the local backend and move on to the next available provider.
While the OPENAI_API_KEY is optional, it can be helpful for analyzing ambiguous source images. When enabled, it powers the vision classifier at /api/3d/analyze, improving prompt generation before the image enters the rendering pipeline.
Using 3DCellForge: Step-by-Step Workflows
Navigating the Interface
3DCellForge's workspace is split into three main sections: the Model Library on the left, the WebGL stage in the center, and the Asset Source rail on the right. This layout keeps everything within reach while allowing for smooth interaction. For example, you can rotate models with a left-click or zoom in and out using the scroll wheel on the WebGL stage. To maintain an organized workspace, previous generations are tucked away in a collapsed "Saved Assets" section on the left.
The top navigation bar provides two modes: Library and Demo. Library mode displays the full catalog of assets, complete with previews and task IDs. Demo mode, on the other hand, hides the side panels and focuses on cinematic camera paths for a more immersive experience. For detailed information, the "Inspect" feature opens a contextual drawer, where you can view the asset's category, material details, and quality scores. These scores are based on factors like triangle count, texture count, and file size.
| Interface Component | Location | Primary Function |
|---|---|---|
| Model Library Rail | Left | Select active assets and access saved history |
| WebGL Stage | Center | Interactive 3D inspection (rotate, zoom, isolate) |
| Asset Source Rail | Right | Choose AI providers or import local files |
| Generation Queue | Left | Monitor upload, generation, and import progress |
| Inspector Drawer | Contextual | View metadata, material details, and quality scores |
With the interface covered, let’s move on to generating your first 3D model using the AI tools.
AI-Powered 3D Model Generation
To start creating, head to the Asset Source rail on the right. Here, you can select from various AI providers, including Hyper3D Rodin, Tripo, Fal.ai (supporting TRELLIS and TripoSR), local Hunyuan3D, or browser-based JS Depth. Upload your reference image, and the Generation Queue will update in real time, showing the progress of your job through upload, processing, and delivery.
If you’re looking for simplicity, Auto mode handles the heavy lifting. It cycles through providers in a set order (Hyper3D → Tripo → Fal → Hunyuan → JS Depth) and automatically switches if a service fails or credentials are missing. For those with an OPENAI_API_KEY, the /api/3d/analyze endpoint can classify your upload and optimize prompts for ambiguous images before they enter the generation pipeline.
Once the model is generated, check the quality card displayed on the WebGL stage. Low scores - caused by issues like sparse triangle counts, missing textures, or oversized file sizes - indicate that the output might need adjustments before it’s ready for use.
Editing and Managing Scenes
After generating a model, you can refine it further. Use the Inspector drawer to isolate specific parts for closer inspection. This tool also categorizes assets (e.g., vehicles, aircraft, or organic models) and highlights material focus areas, which can help catch texture issues early. If you want to compare AI-generated models with hand-crafted ones, you can import .glb or .gltf files via the "New Upload" option on the right rail.
All models - whether generated or imported - are saved locally, so you won’t lose progress between sessions. The Library drawer also includes a provider comparison view, letting you evaluate outputs from different AI backends side by side.
Exporting and Sharing Assets
When your model is polished, you can export it as a GLB file or capture high-quality screenshots. For presentations, Demo Mode collapses the UI and activates cinematic display paths tailored to the asset type. For instance, organic models get a studio orbit, vehicles feature a road push-in, and aircraft are showcased with a flight pass. These paths ensure your assets are presented in their best light.
If you're working offline or conserving API credits, cached demo GLB models in the repository can be loaded directly into the stage. This allows you to create screenshots or recordings without relying on external services.
Extending and Customizing 3DCellForge
Customizing the Codebase
3DCellForge is built on a modular framework using React, Vite, Three.js, and React Three Fiber (R3F). This setup allows for targeted changes without impacting unrelated parts of the system.
For tasks involving the 3D scene, the gltfjsx utility is a key tool. It converts .glb files into JSX component trees, letting you manipulate individual meshes and materials directly. Pair this with Valtio's proxy-based state management, and you can create features like live color pickers or material swappers that instantly update the scene. The useFrame hook from R3F is ideal for per-frame logic, such as adding auto-rotation, floating effects, or custom camera animations, all while staying within the render loop.
For UI adjustments, the src/ directory is where you'll spend most of your time. Framer Motion is already integrated here, which means any new elements like drawers or collapsible panels will automatically adopt the existing animation styles. After making layout changes, you can run npm run test:visual:update to refresh Playwright's screenshot baselines.
Here’s a quick reference for the main areas you might customize:
| Area | Tools | File/Folder |
|---|---|---|
| 3D scene logic | React Three Fiber, Drei | src/ (Canvas components) |
| UI & layout | React, Framer Motion | src/ (Workbench components) |
| AI providers | Node.js | server.mjs |
| API secrets | Dotenv | .env.local |
| Data persistence | IndexedDB, localStorage | src/ (Storage utilities) |
| Visual regression | Playwright | test/ |
Once you’ve familiarized yourself with the codebase, you can move on to extending its capabilities by connecting it to external tools.
Integrating with External Tools
3DCellForge exports models in the .glb format by default. This makes it easy to import assets into platforms like Blender, Unity, or Unreal Engine without requiring additional conversions. The .glb format is particularly useful because it bundles geometry and textures into a single file, offering faster runtime loading compared to .gltf files, which rely on separate linked assets.
For validating materials before integrating them into a rendering pipeline, you can use the Khronos glTF sample models. Simply upload them via the "New Upload" button to check for any issues.
On the backend, expanding AI-driven generation features is straightforward. You only need to modify server.mjs and add the relevant API key to .env.local. This approach is already used for integrating providers like Tripo, Fal.ai, and Hyper3D. To save on API credits, generated models are cached in the .generated-models/ directory.
For APIs that require polling (a common requirement for GLB generation), you can implement exponential backoff in your handler. The Tripo integration serves as a practical example. If you’re working with multiple providers at once, it’s important to monitor rate limits for each one to avoid overloading.
If you're automating workflows, the /api/3d/analyze endpoint can streamline the process. This endpoint uses the OPENAI_API_KEY to classify uploads and generate optimized prompts before the assets enter the generation queue. It’s particularly helpful for bulk processing, such as tagging reference images from a product catalog or asset library, ensuring consistent results without manual intervention.
Contributing to the 3DCellForge Project
The 3DCellForge project thrives on community involvement, and getting started as a contributor is straightforward. Here's how you can actively participate and make a difference.
How to Contribute
To begin, fork the repository and set up your local development environment. After cloning the repository, run the following commands:
npm installto install dependencies.npm run devto start the frontend in development mode.- For backend tasks, such as integrating a new generation provider, also run
npm run dev:apito enable the Node server to manage API calls effectively.
Before submitting your pull request, ensure your changes meet the project's standards by running these validation commands:
| Command | Purpose |
|---|---|
npm run lint |
Verifies code adheres to project coding standards. |
npm run build |
Confirms the project compiles correctly for production. |
npm run test |
Executes the test suite to verify functionality. |
npm run test:visual |
Runs Playwright checks for layout and screenshot regressions. |
If your work involves UI changes, update Playwright baselines with npm run test:visual:update. Every pull request you make not only enhances the tool but also contributes to the broader growth of the 3DCellForge community.
Staying Updated on Project Progress
The repository is under active development, with recent updates focusing on model studio controls and asset intelligence. To stay informed, watch the repository on GitHub for notifications about new issues, pull requests, and updates. Both the English (README.md) and Chinese (README.zh-CN.md) documentation are kept in sync and serve as effective changelogs. Whenever you update your local clone, remember to run npm install again to ensure compatibility with any new backend dependencies, such as those introduced by providers like Fal.ai or Hunyuan3D.
Forking and Customizing Safely
Community forks showcase the project's adaptability, with contributors adding features like "JS depth relief mode" and Rodin generation providers. However, fork drift can become an issue - one public fork was observed to be 10 commits behind the main branch in a short time. To avoid merge conflicts, regularly sync your fork with the upstream repository.
When working on a fork, follow these two critical rules:
- Store all API keys (e.g.,
TRIPO_API_KEY,FAL_API_KEY,OPENAI_API_KEY) in your local.env.localfile. This file is ignored by Git, ensuring sensitive information stays private. - Never expose secrets in the frontend bundle.
The project is designed to keep provider credentials server-side, routing them through the Node backend at http://127.0.0.1:8787. Violating this separation could unintentionally expose credentials in public forks. By adhering to these practices, your contributions will help maintain the project's integrity and support its continuous development.
FAQs
What do I need to run 3DCellForge locally?
To get 3DCellForge running locally, start by making sure you have Node.js installed on your machine. Once that's set, clone the repository, navigate into the project directory, and install the required dependencies using:
npm install
To launch the development server, run:
npm run dev
If you're planning to use the image-to-3D generation feature, there's an additional step. Copy the .env.example file to .env.local, then add your API keys in the .env.local file. Once that's configured, start the backend server with:
npm run dev:api
Remember to keep your API keys secure and never share the contents of your .env.local file.
Which AI backend should I use for the best GLB results?
For the best results with GLB generation, consider using the local Hunyuan3D provider paired with the Hunyuan API backend or opting for the Tripo cloud generation service. Both choices deliver high-quality GLB outputs with caching capabilities, ensuring dependable performance tailored to your configuration.
How can I avoid burning through API credits while iterating?
To keep your API credit usage in check while working with 3DCellForge, make sure to store your API key securely in a .env.local file on the server side. This ensures the key remains hidden from the frontend, safeguarding it from potential exposure. Additionally, caching the generated GLB models for offline use is a smart move. By doing so, you can avoid repeated API calls during testing, making iterations smoother and conserving your credits for when they're truly needed.
Member discussion