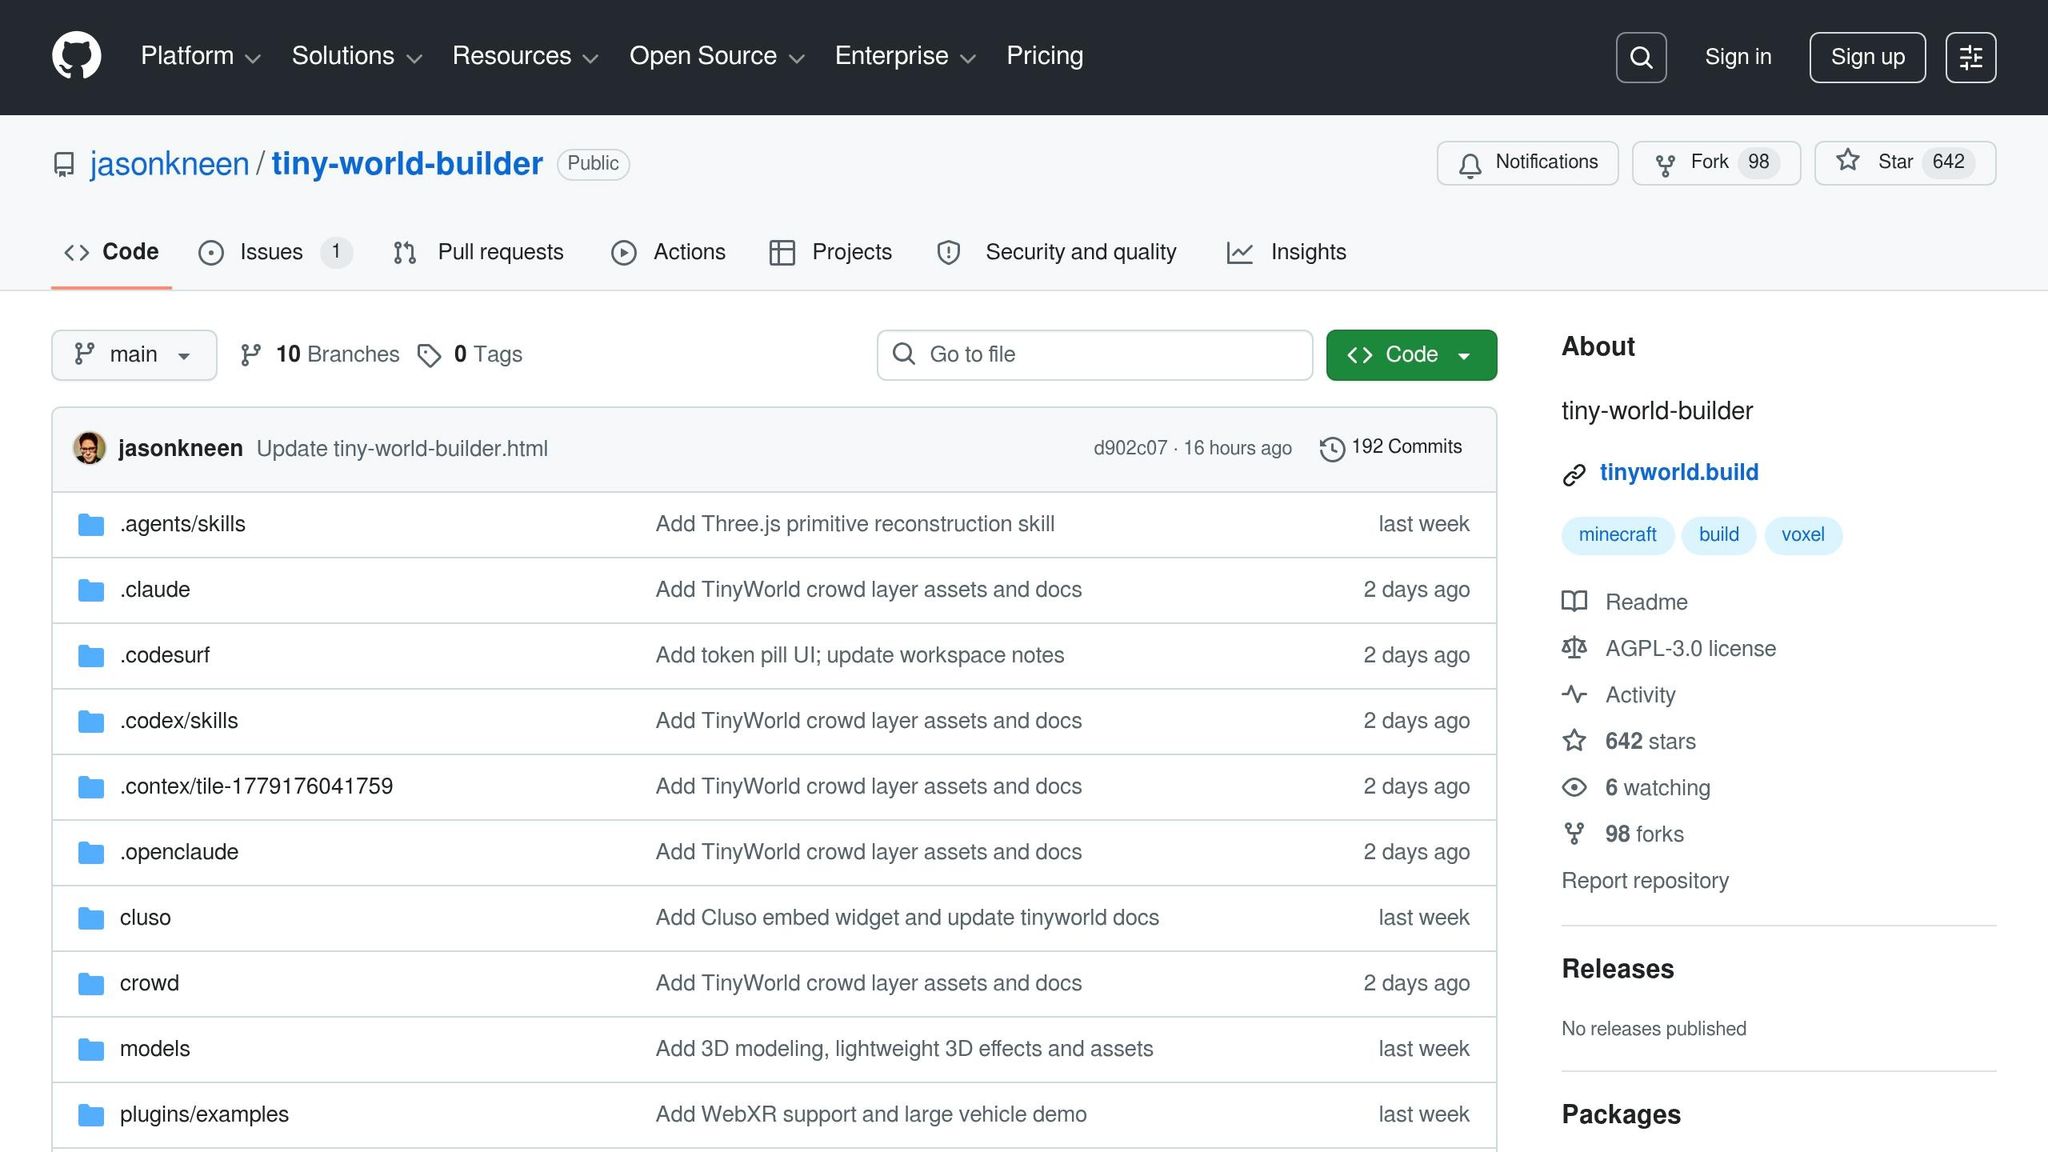
tiny-world-builder: Spawn Walkable Voxel Worlds From a Single Prompt - https://github.com/jasonkneen/tiny-world-builder
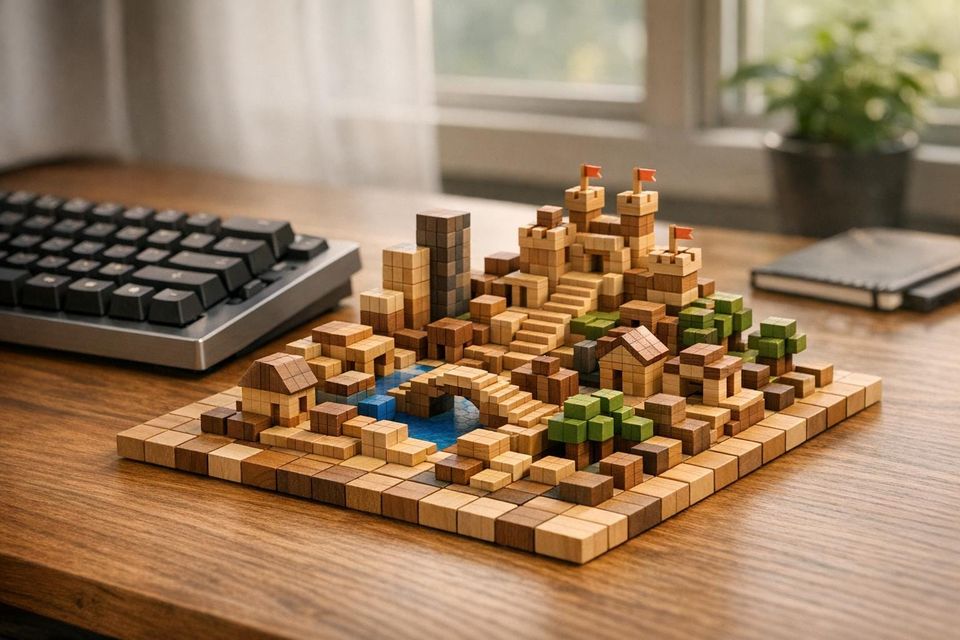
I spent half a Saturday morning typing prompts into tiny-world-builder, trying to generate a "coastal village with a castle on a hill." By 11:00 a.m., I had a walkable voxel world in my browser - roads, terrain, and even a few delivery bots navigating paths. No Unity installs, no asset packs, no procedural headaches. The entire thing ran from a single HTML file, and the setup took less than five minutes.
The pitch is simple: type a description, and this open-source tool generates a 3D voxel environment complete with collision, pathfinding, and AI-driven traffic. But tools like this always raise questions. How well does it handle edge cases? Does it save time, or does debugging its quirks eat up the hours you saved? And can something this lightweight actually scale for more serious projects? This post dives into what works, what doesn't, and whether tiny-world-builder is worth adding to your toolkit.
I Built an AI Voxel World Generator & Character / Object & Animation Generator
The problem tiny-world-builder solves
Creating a walkable 3D voxel world from scratch is a labor-intensive process. Even seasoned developers face the grind of manually placing terrain, buildings, roads, and vegetation. The work becomes even more tedious as new terrain types introduce alignment challenges between neighboring elements.
What current methods require
The difficulty isn't just in placing individual tiles - it’s ensuring that everything connects properly. Roads need to form clean junctions, riverbanks must align seamlessly, and fences have to link without gaps or overlaps. Developers often resort to painstaking manual adjustments or complex procedural logic to manage all the possible neighbor configurations.
Walkability adds another layer of complexity. Collision envelopes need to be defined, blocked tiles marked, and pathfinding systems set up to prevent characters and vehicles from walking through walls or getting stuck in the environment. Beyond that, gameplay elements like spawn points, objectives, and NPC placements require manual checks to ensure they don't interfere with the physical layout. Overlooking just one detail - like a spawn point inside a wall - can lead to frustrating gameplay bugs.
These hurdles highlight the need for a faster, more efficient solution.
Why a text-prompt approach changes things
tiny-world-builder addresses these challenges by letting you describe your world in plain text. Using the "Agent conversation" box, you can type a description, and the tool generates a structured, walkable 3D world complete with terrain, roads, buildings, and rivers - all aligned and ready to go within seconds. The generated environment comes with built-in collision, pathfinding, and Road AI, eliminating the need for manual adjustments.
This approach drastically reduces the time spent on iteration. Instead of manually tweaking tiles or writing procedural code, you focus on describing your vision, and the tool handles the rest. For solo developers working on prototypes, this can cut development time from days to hours.
"The model is split cleanly: world[x][z] - intent: { terrain, kind, floors } per cell." - Jason Kneen
What you need before starting
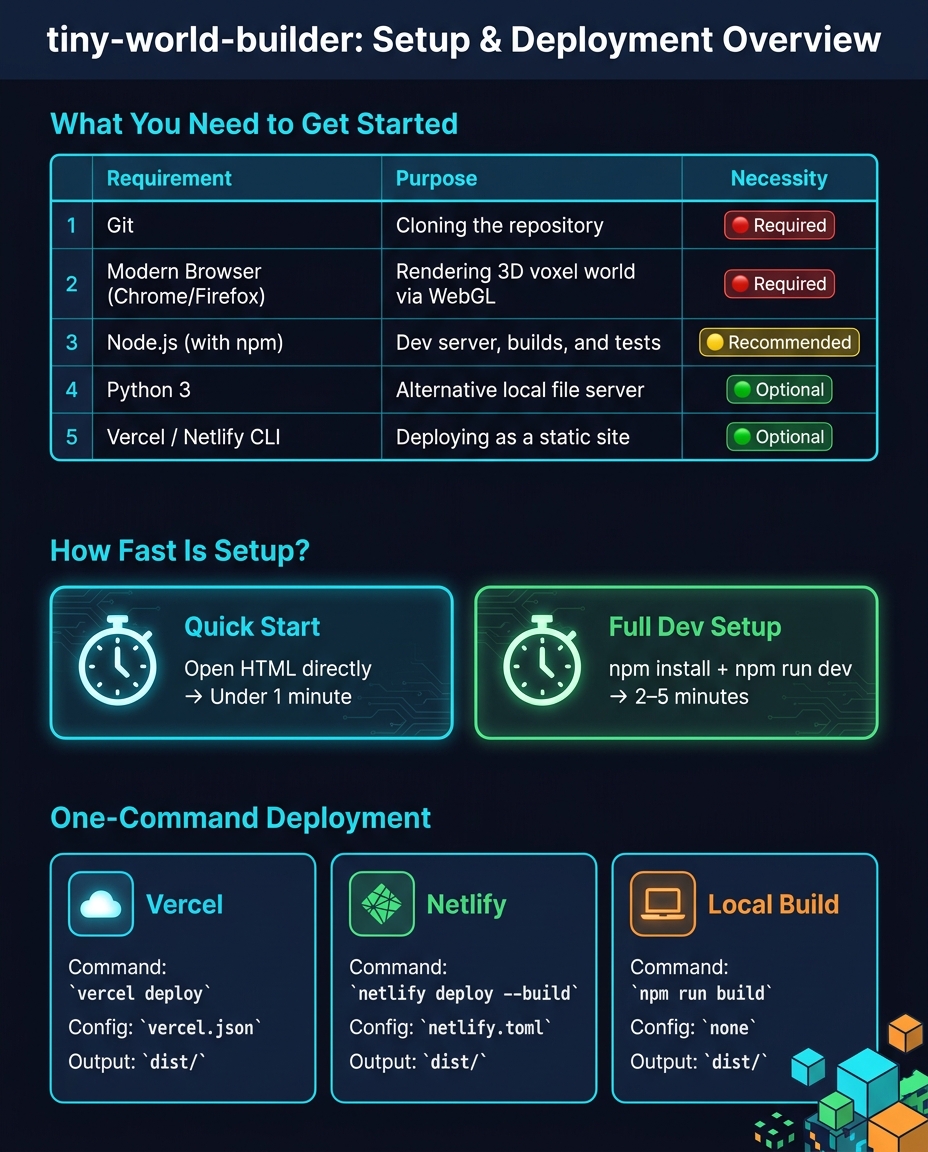
tiny-world-builder: Setup Requirements & Deployment Options at a Glance
Before diving into your voxel world creation, make sure your system meets these requirements.
The good news is that tiny-world-builder keeps things simple. With 94.8% of the project written in HTML and all libraries self-hosted, you won’t need to worry about runtime CDN calls or complicated setups. Once you’ve cloned the repository, you’re ready to go.
Required tools and software
To get started, you’ll need three essentials: Git, a modern browser (like Chrome or Firefox), and Node.js (with npm). Git is for pulling the repository, the browser handles rendering the voxel world using Three.js, and Node.js powers the development server if you prefer running it at http://localhost:3000/tiny-world-builder instead of opening the HTML file directly.
If Node.js isn’t installed, you can use Python 3 as an alternative. Just run python3 -m http.server 8000 from the project directory, and you’ll have a local file server without any extra installations. While VS Code can be handy for editing, it’s not required for generating your voxel world.
| Requirement | Purpose | Necessity |
|---|---|---|
| Git | Cloning the repository | Required |
| Modern browser (Chrome/Firefox) | Rendering the 3D voxel world via WebGL | Required |
| Node.js (with npm) | Dev server, builds, and tests | Recommended |
| Python 3 | Alternative local file server | Optional |
| Vercel / Netlify CLI | Deploying the world as a static site | Optional |
Note: WebGL rendering requires a GPU or compatible integrated graphics. Most laptops from the last five to six years will handle this comfortably.
Once you’ve got these tools in place, you’re ready to set up tiny-world-builder on your machine.
How long setup takes
The setup process is quick and straightforward. Cloning the repository and opening tiny-world-builder.html takes less than a minute. If you go for the full development setup with npm install and npm run dev, expect it to take between 2–5 minutes, mostly spent waiting for dependencies to install. There’s no database, no API keys, and no environment variables to configure - just a smooth path to your first voxel world.
Setting up tiny-world-builder locally
Cloning the repository
To get started, clone the repository and navigate into the project directory:
git clone https://github.com/jasonkneen/tiny-world-builder
cd tiny-world-builder
The repository includes the vendor/three/ directory, which means Three.js r128 and GLTFLoader are bundled in the clone. There's no need to fetch additional assets separately.
Running the application
You have two ways to run the app. The simplest approach is to open tiny-world-builder.html directly in Chrome or Firefox. However, for live reloading and stable local storage, use the dev server:
npm install
npm run dev
# Serves at http://localhost:3000/tiny-world-builder
If port 3000 is already in use, you can specify a different port:
npm run dev -- 3001
Once the app is running, confirm the setup by executing the test suite:
npm test
The tests check syntax, schema alignment, and the integrity of local assets. This ensures everything is functioning as expected.
Fixing common setup problems
If you run into issues, here are some troubleshooting tips:
- Missing 3D models or textures: Double-check that the
vendor/three/directory exists. If it's missing, re-clone the repository to restore the required assets. Without these, you'll see a blank canvas. - Launch errors: If the app doesn't start, inspect the browser console for JavaScript errors. Since the app is a single ~16,000-line vanilla JS file, any issues should appear there. You can also run
node tools/smoke-static.jsto identify syntax or loading problems. - Local world saves not persisting: Make sure local storage is enabled for
localhost. The "Local world slots" feature writes directly to browser storage. If storage permissions are blocked, saves won't work, and no errors will be displayed.
Generating a voxel world from a prompt
Entering your first prompt
Once the app is live at http://localhost:3000/tiny-world-builder, you’ll see a grid canvas alongside an Agent Conversation box. This is where you’ll type your prompts. Hit enter after typing, and the engine will work its magic. If you’ve selected specific cells on the grid, only those will update; otherwise, the entire canvas will reflect your input. Watch as your text transforms into a voxel world, complete with interconnected details.
What the output looks like
The engine delivers more than just a static grid - it generates a dynamic voxel world that feels alive. Using adjacency-aware rendering, the system adjusts assets based on their neighbors, ensuring seamless transitions. Tiles animate into place, adding life with details like swaying trees and shifting shadows. Walkability is baked in, so if you place an obstacle on a path post-generation, bots will automatically reroute using alternate pathways. You can switch between views - press P or I to toggle isometric, soft, and perspective angles.
Experiment with different prompts and the asset palette to see just how adaptable the tool can be.
Prompt examples to try
Sticking to keywords from the built-in asset palette ensures cleaner and more precise results. Here’s a quick reference for available assets:
| Category | Available Assets |
|---|---|
| Terrain | Grass, Path, Dirt, Water, Stone, Lava, Sand, Snow |
| Structures | Houses, Fences, Bridges, Castle Walls |
| Nature | Trees, Rocks, Tufts, Flowers, Bushes |
| Crops | Corn, Wheat, Pumpkin, Carrot, Sunflower |
| Entities | Cows, Sheep, Delivery Bots, Vehicles |
For example, a prompt like "a small farming village with wheat fields, a dirt road through the center, and a river along the eastern edge" aligns perfectly with these categories. Similarly, "a volcanic island with lava flows, stone paths, and a castle on the northern cliff" works well because the terms lava, stone, path, and castle walls are part of the palette. On the other hand, vague prompts like "a cool world" tend to result in generic layouts. Being specific about terrain, structures, and foliage density will always yield better results.
Customizing and expanding your voxel world
Adjusting world parameters
You can tweak your voxel world by adding URL parameters before loading. For instance, ?size=32 sets the grid size (options include 12, 16, 20, 32, and 48), while ?cars=60 populates the scene with 60 vehicles for a dynamic traffic simulation.
Inside the canvas, terrain height is adjusted one cell at a time using keyboard shortcuts. Press R to raise the tile under your cursor or F to lower it. The renderer automatically updates textures based on the surrounding tiles, so placing a water tile next to raised stone creates a shoreline effect seamlessly.
The UI includes "Time & weather" and "Season" controls, allowing you to add effects like rain, snow, or storms. These options not only make the scene more visually engaging but also offer practical settings for prototyping game environments.
Adding custom assets or features
If you want to go beyond the default setup, you can integrate custom assets and features into your voxel world. Each cell in the world[x][z] model stores terrain type, object information, and floor data. To modify a cell, use the setCell(x, z, opts) function. This updates the cell and triggers the renderer to rebuild the relevant Three.js meshes. If you're adding new asset types, remember to update the world.schema.json file to ensure compatibility with saving and exporting.
For more advanced structures, the tool uses breadth-first search (BFS) functions like bfsHouseCluster and tryComposite to combine adjacent house cells into L-, T-, or square-shaped buildings. Study these patterns before implementing custom adjacency logic. The AGENTS.md file can also guide you in using AI code assistants to introduce new building types without needing to reverse-engineer the renderer.
In May 2026, Jason Kneen showcased the system's flexibility by adding a "crowd layer" and a "crop duster" feature. These animated scene layers worked on top of the existing renderer, proving that you can implement complex visual elements without altering the core voxel grid.
Saving and iterating on your designs
Once you've customized or expanded your world, you can save your progress using the built-in save feature. The "Save as new" option in the "My worlds" menu creates a named browser slot for your design, making it easy to back up a version before making major changes.
You can also use a URL seed parameter, such as ?seed=ridge-loop-917, along with a specific size parameter to create a shareable, reproducible starting point. This is especially handy for collaborating with teammates or revisiting a design later.
For AI-driven edits, you can target specific areas of your world by selecting the desired tiles first. The engine will then apply changes only to the selected cells, giving you precise control over your modifications.
These tools and features make it simple for developers to refine and expand their voxel environments with efficiency and precision.
Publishing and sharing your voxel world
Supported export formats
tiny-world-builder generates a static site by producing a dist/ directory when you run npm run build. This folder includes everything required to serve your app, such as the HTML, the core JavaScript file, and local copies of vendor assets. There’s no reliance on external CDNs at runtime, making deployments self-contained and independent of third-party hosting services.
For handling world data, the tool uses a world.schema.json file as its import/export schema. Any world saved to a browser slot can be programmatically accessed through this schema, ensuring consistent data handling across imports and exports.
Deploying to a hosting platform
The tool supports deployment to both Vercel and Netlify without any extra setup. A publish.sh script is included in the repository, which these platforms automatically execute during their build pipelines to create the dist/ directory. For Netlify users, the repository also includes a pre-configured netlify.toml file, so connecting your fork to Netlify is as simple as pointing it to your repository - no need for additional build settings.
| Platform | Command | Config File | Deployable Output |
|---|---|---|---|
| Vercel | vercel deploy |
vercel.json |
dist/ |
| Netlify | netlify deploy --build |
netlify.toml |
dist/ |
| Local build | npm run build |
- | dist/ |
Before deploying, it’s a good idea to run npm test locally. This step checks for syntax errors, ensures the schema matches expectations, and verifies local asset references. Catching issues early prevents surprises after deployment. Once your build is tested and deployed, you’re ready to share your world with others.
Sharing with collaborators or the community
Once deployed, sharing your voxel world is simple. The easiest method is sharing seeded URLs. Because the world generation is deterministic, appending a seed parameter like ?seed=tide-ridge-428 to your hosted URL ensures that anyone accessing it will see the exact same layout, terrain, and structures. You can also stack multiple parameters to provide more context, such as ?seed=tide-ridge-428&size=48&cars=18&stats=1. This URL not only locks the seed but also specifies grid size, vehicle count, and enables a stats overlay for reviewers.
For ongoing collaboration, the "Local world slots" feature allows contributors to save and name browser-based versions of their work during development. This makes it easy to iterate without affecting the shared deployment. Once the design is finalized, you can push your fork to GitHub and share the repository link. With 97 forks and 640 stars as of May 2026, the project has an active community eager to engage with and build upon new contributions.
Is tiny-world-builder worth using?
Who will get the most out of it
If you need a walkable 3D environment quickly without diving into the complexities of a full game engine, tiny-world-builder fits the bill. It’s particularly useful for rapid prototypers, game designers, and traffic researchers. The deterministic seed system and grid support (up to 48×48) allow for seamless environment sharing and simulation of up to 120 concurrent vehicles with active rerouting, all customizable through URL parameters. The deterministic seed system ensures consistent world replication across teams, eliminating the need for file transfers.
For those aiming to create playable environments, the Adventure World Builder fork is a standout. It layers in combat, character sprites, and objective validation across themed settings like Japan, China, City, and Classic. This addition simplifies creating engaging gameplay without starting from scratch.
That said, the tool isn’t without its challenges.
Drawbacks and limitations to know
While tiny-world-builder excels in speed and simplicity, some trade-offs are worth noting. Its single-file architecture can be a maintenance headache - the entire app is packed into a single <script> block spanning about 16,000 lines of vanilla JavaScript. Additionally, it relies on a fixed version of Three.js (r128).
The AGPL-3.0 license is another sticking point. It restricts commercial use, requiring any publicly hosted modified code to share its source under the same terms, which can complicate proprietary projects. Beyond licensing, the tool enforces strict terrain rules - crops require dirt underneath, bridges need water, and objects placed on path cells become immovable traffic obstacles. These limitations can restrict both creativity and functionality.
Final verdict
For prototyping, research, or hobby projects where speed is critical, tiny-world-builder delivers. Its prompt-to-world pipeline, adjacency-aware rendering, and one-command deployment make it easy to go from concept to a shareable URL in no time. However, for commercial applications or projects demanding a scalable, maintainable codebase, the single-file structure and licensing terms are significant drawbacks that may outweigh its benefits.
FAQs
Can I use tiny-world-builder in a commercial project under AGPL-3.0?
Yes, you can include tiny-world-builder in a commercial project, as it is distributed under the GNU Affero General Public License v3.0 (AGPL-3.0). However, keep in mind that AGPL-3.0 is a copyleft license, which means if you modify the software or use it as part of a network service, you are obligated to share the source code of your modified version. It's a good idea to consult with a legal expert to make sure you're meeting all the license requirements.
How do I add my own assets or tile types without breaking saves?
To integrate new assets or tile types without disrupting existing saves, you’ll need to adjust both the import/export schema and the world cell structure. Ensure that any new tile kind or terrain values are properly defined in world.schema.json. Additionally, update the validation scripts - tools/check.js and tools/smoke-static.js - to ensure everything remains compatible.
The integrity of saves depends on the cell model, structured as world[x][z] with properties like { terrain, kind, floors }. When making updates, use setCell(x, z, opts) and ensure the updates align with the existing structure to avoid inconsistencies.
What’s the best way to share the exact same world with someone else?
To share your world data effectively, export it as a JSON file. Although the tool relies on local browser storage for saving worlds, the Adventure World Builder project includes support for JSON-based import and export. This allows you to save all details - terrain, objects, and markers - in a portable format. By sharing the JSON file, others can import it into their instance and access or interact with the exact same world setup.
Member discussion