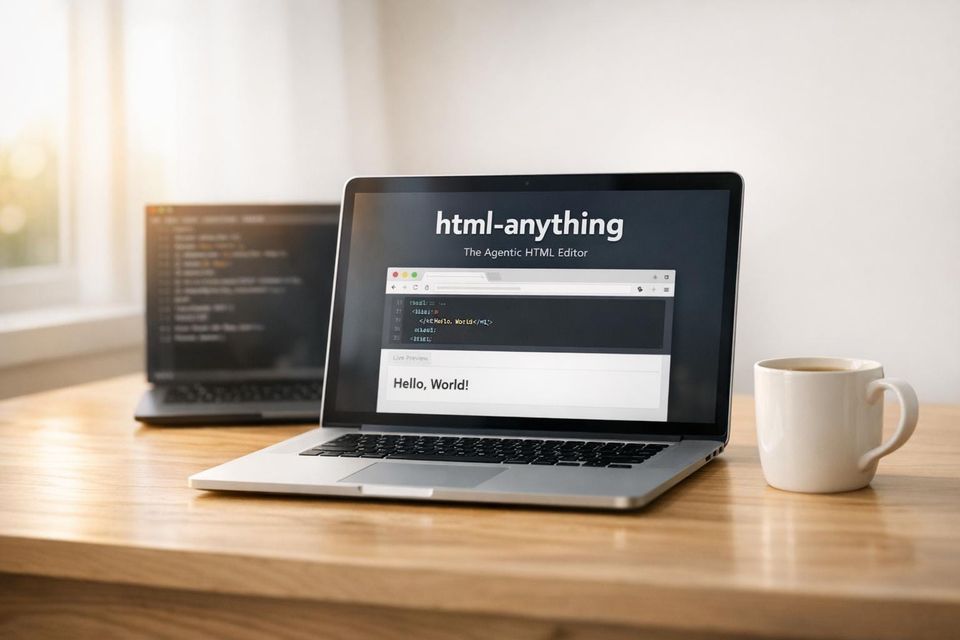
html-anything: The Agentic HTML Editor That Skips API Keys and Uses Your Claude Code Login
I’ve spent more hours than I care to admit wrangling API keys for AI tools. One misplaced .env file, and you’re staring at a leaked credential or, worse, a surprise cloud bill. In April, a Sydney developer got hit with $25,672.86 AUD in charges after a leaked key was exploited. Google refunded the money after public outcry, but that’s a headache I’d rather avoid. So when I heard about html-anything, a local-first HTML editor that skips API keys and runs off your existing Claude Code login, I was intrigued.
The pitch is simple: Markdown is your draft, HTML is the finished product, and your local AI agent does the heavy lifting. No API keys, no .env files, no risk of credentials leaking into the wrong hands. Instead, html-anything detects your authenticated coding agent - Claude Code, Cursor, Gemini CLI, or one of several others - and uses it to generate polished outputs, from newsletters to web prototypes. But does it deliver on that promise, or is it just another tool that sounds good on GitHub but falls apart in practice? Let’s break it down.
The Problem html-anything Solves
Managing API keys in AI-driven HTML workflows is a hassle. It’s not just about the risk of exposing credentials - it’s also the time spent on key rotation and the nightmare of a leaked key being misused in the wrong environment, whether it’s development or production.
Why Managing API Keys Is Such a Pain
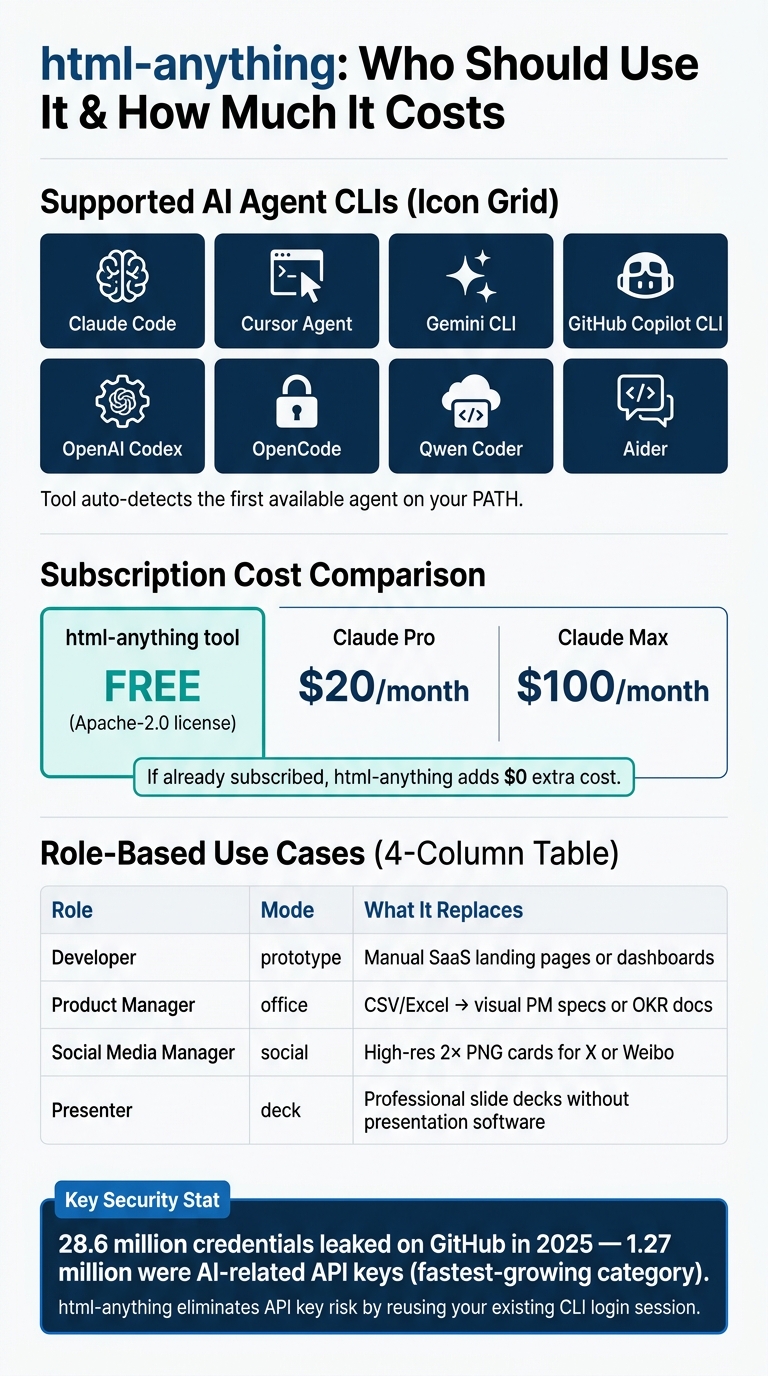
The security risks are hard to ignore. In 2025, 28.6 million credentials were leaked on public GitHub repositories. AI-related keys, including those for OpenAI, Anthropic, and Hugging Face, made up 1.27 million of those leaks, marking them as the fastest-growing type of exposed secrets. And the consequences aren’t just theoretical. In April 2026, a Sydney developer, Jesse Davis, found himself on the hook for a Google Cloud bill of $25,672.86 AUD (about $18,391.78 USD) after a leaked key was exploited over a single weekend. While Google eventually refunded the charges, it only happened after a wave of public pressure.
There’s also the issue of agent behavior. AI coding agents often scan files like .env, and even if you set deny rules in .claude/settings.json, they can still be bypassed with creative file-reading approaches. As security researcher Houtini bluntly put it:
"Don't rely on the agent's good behaviour to keep secrets safe. Don't put the secrets where the agent can see them in the first place." – Houtini
How html-anything Sidesteps API Key Management
html-anything takes a different approach by leveraging the authenticated CLI sessions already configured in your system’s PATH. If you’ve logged in via claude login or a similar command, the tool detects that session automatically when it starts. This eliminates the need for a .env file, key generation, or any additional credential setup.
"We reuse the session you already have logged in via
claude login·cursor login·gemini auth. Your existing subscription does the work; marginal cost is $0." – nexu-io
The tool runs the local CLI (e.g., claude -p --output-format stream-json), sending instructions via stdin and receiving results as JSON lines. This setup ensures the agent operates entirely on your machine, avoiding the need for duplicate keys stored in files that could accidentally be exposed.
Who Benefits From html-anything
The tool is ideal for two types of users. Developers who need to quickly create static pages, dashboards, or technical documentation will find it particularly useful, especially if they already use top AI code assistants like Claude Code or Cursor locally and want to skip the manual work of crafting CSS or responsive layouts. Meanwhile, marketers and content creators who need polished HTML for landing pages, social cards, or newsletters will appreciate its natural-language prompt interface, which delivers functional output without requiring them to touch the underlying code.
To use html-anything, you’ll need an active subscription to a supported agent. For example, Claude Pro costs $20/month, while Claude Max is $100/month. If you’re already subscribed, running html-anything adds no extra cost to your workflow. Next, let’s look at the prerequisites for getting started with html-anything.
What You Need Before You Start
Supported Operating Systems and Required Tools
html-anything works on macOS, Linux, and Windows 10 or later. If you're on Windows, you'll need WSL2 to ensure smooth CLI detection. The tool scans typical binary paths like /opt/homebrew/bin, ~/.local/bin, ~/.bun/bin, and ~/.npm-global/bin for the necessary binaries. These paths help integrate the tool with your authenticated AI agent, aligning with the local-first workflow mentioned earlier. Keep in mind that Windows users must rely on WSL2 for correct CLI binary detection.
Before cloning the repository, make sure you have Node.js (version 18 or higher), pnpm, and Git installed. You can check your Node.js version and install pnpm using these commands:
node --version
npm install -g pnpm
Additionally, ensure that at least one supported AI agent CLI is accessible on your system's PATH. Supported options include Claude Code, Cursor Agent, Gemini CLI, GitHub Copilot CLI, OpenAI Codex, OpenCode, Qwen Coder, or Aider. The tool will automatically detect the first available agent during startup.
The hardware requirements are minimal: 4 GB of RAM is enough for basic tasks, though 8–16 GB is better for handling larger editing workloads.
Setting Up a Claude Code Account
If you plan to use the Claude Code agent, note that it’s not included in the free Claude.ai plan. You’ll need either a Claude Pro subscription ($20/month) or a Claude Max subscription ($100/month) to access the claude binary. Once subscribed, install the CLI with one of these commands:
npm install -g @anthropic-ai/claude-code
On macOS, you can also install it via Homebrew:
brew install --cask claude-code
Running the claude command will trigger an OAuth prompt that links to your Anthropic account. This setup eliminates the need for an API key or .env file. To confirm the installation, run:
claude --version
If this command returns a version number, html-anything will automatically detect the agent.
For those already authenticated with other supported agents like Cursor or Gemini CLI, those sessions will work as well. While Claude Code is the primary agent, it’s not mandatory. Once your account is ready, you’re all set to move on to the setup process.
Time, Effort, and Cost Breakdown
With your tools and account in place, the setup is quick. If Node.js and pnpm are already installed, you can complete the entire process - including cloning the repository, installing dependencies, and verifying the agent connection - in under 5 minutes. If you’re starting from scratch without Node.js, the setup might take closer to 15 minutes.
html-anything itself is free under the Apache-2.0 license. The only ongoing cost is your AI subscription. If you’re already paying for a Claude Pro or Claude Max plan for other projects, using html-anything won’t add any extra expenses.
How to Install and Configure html-anything
Cloning the Repo and Installing Dependencies
Getting started involves running just a few commands. Open your terminal and execute the following:
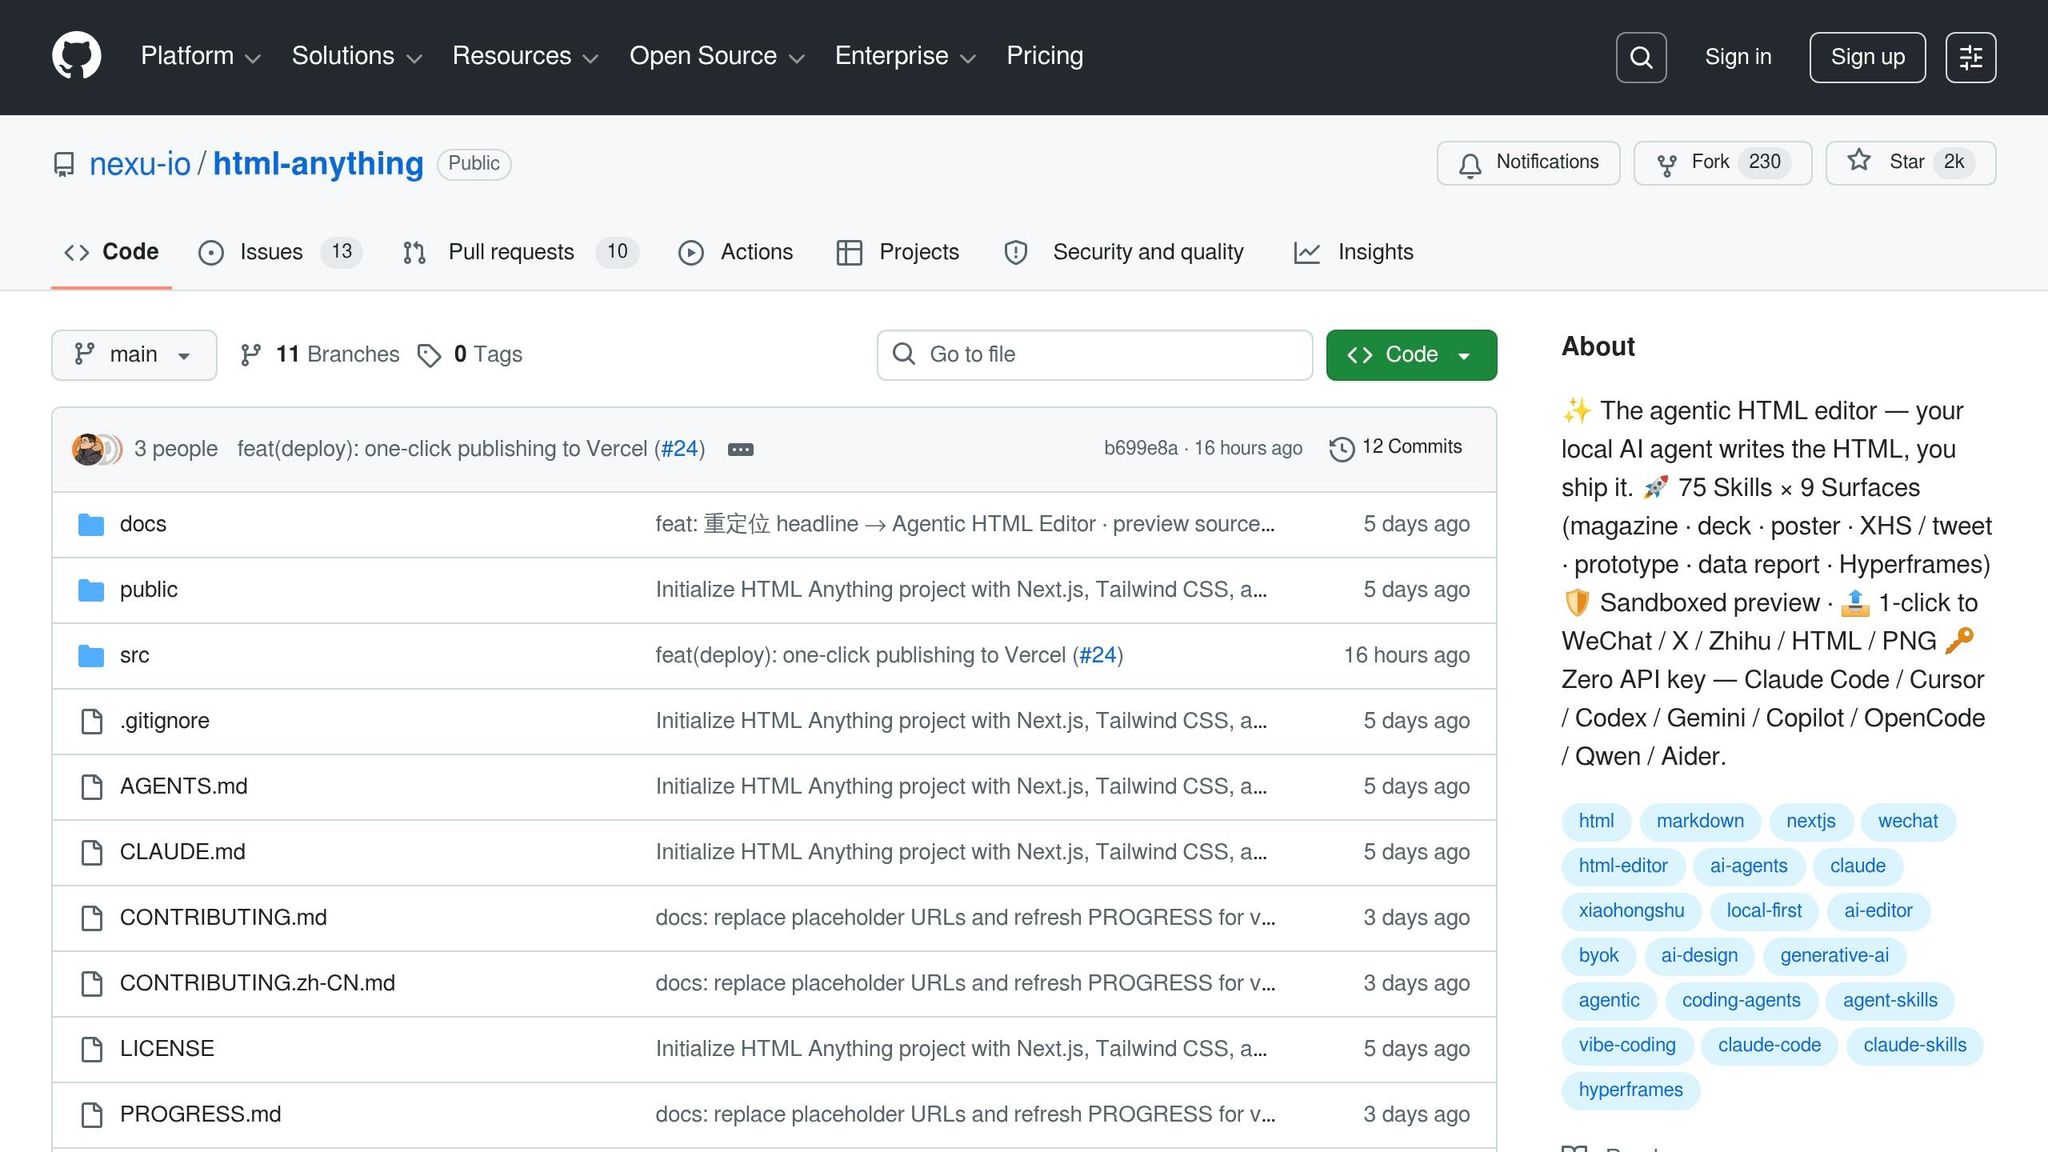
git clone https://github.com/nexu-io/html-anything
cd html-anything
pnpm install
Make sure to run pnpm install inside the html-anything directory; otherwise, you'll encounter a "package.json not found" error. If you don't have pnpm installed, you can add it globally with:
npm install -g pnpm
Starting the Development Server
After installing dependencies, start the Next.js 16 development server by running:
pnpm dev
Once the server is running, open http://localhost:3000 in your browser. If everything is set up correctly, you'll see a top bar displaying the agent name, confirming session detection.
If the top bar is blank, it usually means there's an authentication issue. To fix this, log in with your agent's specific command (e.g., claude login) in the same terminal session before starting the server. Note that if port 3000 is already in use, Next.js will automatically switch to the next available port and display the updated address.
Fixing Common Installation Problems
Here are some troubleshooting tips for common setup issues:
-
PATH Problems: Run
pnpm devin a standard terminal to ensure your full shell PATH is available. Although the app scans common directories like~/.local/bin,~/.bun/bin,/opt/homebrew/bin, and~/.npm-global/bin, starting from a fresh terminal session is the safest bet. -
Dependency Conflicts: Stick to
pnpmfor dependency management. Avoid usingnpm installoryarnto prevent lockfile conflicts or missing workspace dependencies. If problems persist, delete thenode_modulesfolder and any lockfiles, then rerunpnpm install. -
Blank or Crashing Previews: If the preview iframe is blank or crashes during content generation, ensure you're using the latest code. A patch addressing "preview write tool rescue" issues was merged on May 14, 2026. Pull the latest changes with:
Then restart the server.git pull
Once these steps are completed, you're ready to connect html-anything to Claude Code.
Connecting html-anything to Claude Code
How Login-Based Authentication Works
html-anything integrates seamlessly with the active session established by the Claude Code CLI through the claude login command, so there's no need for an API key. During startup, Next.js scans your system's PATH directories - such as ~/.local/bin, ~/.bun/bin, and /opt/homebrew/bin - to locate the claude binary. Once found, it executes the CLI with claude -p --output-format stream-json, piping JSON output directly to the web layer while keeping your OAuth token secure.
On macOS, credentials are stored in the macOS Keychain under entries labeled Claude Code-credentials*. On Linux and Windows, they default to ~/.claude/.credentials.json. This setup uses your existing authenticated session, so you won't need to configure additional credentials.
To ensure everything is working as expected, it's a good idea to run a simple connection test.
Running a Basic Connection Test
When the CLI is properly detected and authenticated, "Claude Code" will show up in the top-bar agent picker at http://localhost:3000. If the picker is blank or missing, it likely means the binary wasn't found on your PATH. Double-check that claude exists in one of the scanned directories and that your terminal session has the correct environment variables loaded.
For a quick functionality check, select a template, enter a simple prompt like "Create a red button" in the editor, and press ⌘+Enter. If the connection is active, you'll see a live HTML preview after issuing the command. If the stream doesn't respond or produces no output, verify the session by running:
claude --version
If your session has expired, refresh it using: (or try OpenClaude-Portable for a USB-based alternative)
npx @anthropic-ai/claude-code /login
Additionally, make sure the ANTHROPIC_API_KEY environment variable is not set, as this ensures the app relies solely on your CLI session.
Once your connection is confirmed, take steps to secure your credentials.
Keeping Your Credentials Safe
Since html-anything operates locally, the main risk to your credentials comes from accidentally exposing sensitive files in a public repository. Pay close attention to two key files:
~/.claude/settings.json: Stores Claude Code permissions and configurations.- Any
CLAUDE.mdfile at your project root: Provides domain-specific context for the agent.
To safeguard these files, add a .claudeignore file to your project root. This prevents the agent from traversing directories like node_modules, .next, or coverage.
If you're using macOS and encounter a "Credentials not found" error, it might be due to a locked keychain. You can unlock it with:
security unlock-keychain ~/Library/Keychains/login.keychain-db
Finally, note that the sandboxed iframe isolates generated content, ensuring cookies and localStorage remain separate from the host application.
The Core HTML Editing Workflow
A Tour of the Interface
The editor is divided into four distinct sections. At the top, the top bar allows you to toggle between detected CLI agents. On the left, you'll find a pane that accepts raw text in various formats like Markdown, CSV, JSON, SQL, or plain text. This data is processed locally using tools such as papaparse and xlsx, ensuring everything stays within your browser. The center pane provides a searchable library of over 75 templates, categorized into 9 deliverable types - think decks, posters, prototypes, and more. On the right, there's a live, sandboxed iframe preview that updates dynamically as the agent generates content.
Each template is designed with strict guidelines, including an 8px baseline grid and a minimum color contrast ratio of 4.5:1. These built-in constraints help ensure a polished, professional output.
Once you’re familiar with the layout, you’ll want to dive into how to give instructions and monitor edits in real time.
Issuing Instructions and Reviewing AI Edits
Now that you know the interface, let’s talk about working with the AI for HTML edits. Start by selecting a template, then paste your instruction into the left pane and press ⌘+Enter. The agent processes your input and streams the updates directly into the iframe's srcdoc using Server-Sent Events.
"Waiting for an AI generation looks like watching it type in real time." - nexu-io
The streaming feature means you don’t have to wait for the entire generation to complete before deciding if it’s heading in the right direction. If the preview starts to deviate from your expectations, you can halt the process mid-stream and re-prompt. This approach not only saves time but also helps you manage token usage, which is critical for keeping subscription costs under control.
To make your workflow even smoother, take advantage of the built-in keyboard shortcuts.
Useful Features and Keyboard Shortcuts
The editor offers several shortcuts to make your work faster and more efficient. For instance, ⌘+C copies either the HTML output or an image directly to your clipboard, while ⌘+S lets you download the content as a .html or .png file. If you’re in Deck mode, you can navigate slides using the ← and → arrow keys, and Ctrl+O expands the code preview, giving you a closer look at the generated source.
| Shortcut | Action |
|---|---|
| ⌘ + Enter | Trigger AI generation |
| ⌘ + C | Copy HTML or image to clipboard |
| ⌘ + S | Download as .html or .png |
| ← / → | Navigate slides in Deck mode |
| Ctrl + O | Expand code preview |
The export options are tailored to specific platforms. For example, when exporting to WeChat, the editor uses juice to inline CSS, ensuring styles remain intact when pasted into the WeChat editor. For X, it employs modern-screenshot to create a high-resolution 2× DPI PNG that’s ready for direct use, eliminating the need for extra formatting.
Practical Use Cases for Developers and Marketers
html-anything: Supported AI Agents, Costs & Use Cases at a Glance
, <header>, and <footer>. It also enforces proper heading hierarchies (<h1>through<h6>) and adds missing alt` tags to images.
The output adheres to strict quality standards, including an 8px baseline grid and a 4.5:1 contrast ratio, ensuring the cleaned-up code is both accessible and visually consistent. For marketers working with platforms like email or WeChat, the one-click juice CSS inlining export simplifies post-cleanup formatting, removing the need for manual adjustments.
"HTML is the final form for humans. Markdown is just an intermediate state during writing." - nexu-io
Adding html-anything to an Existing Project
Integrating html-anything into your workflow is straightforward. Start by cloning the repository, running pnpm dev, and pointing it at your project directory. The agent interacts directly with your existing codebase, adapting to your class names, component patterns, and naming conventions, rather than generating output that feels disconnected from your project.
To ensure the AI’s edits align with your standards, you can use the SKILL.md file to define specific constraints. This might include your design system tokens, preferred CSS methodology, or accessibility guidelines. This approach transforms the agent from a generic tool into one that feels tailor-made for your project.
For teams already familiar with agent-driven development, like Rakuten - who reduced average feature delivery time from 24 working days to just 5 by using parallel agent sessions in 2026 - defining clear constraints through skill files is not just helpful, it’s essential for maintaining consistency across the codebase.
Advanced Configuration and Integration
Adjusting Claude Code Settings
Claude Code uses a five-level hierarchy to determine which settings take precedence: Managed, CLI flags, Local (.claude/settings.local.json), Project (.claude/settings.json), and User (~/.claude/settings.json). If a change you’ve made isn’t applying, it’s likely being overridden by a higher-priority configuration.
You can combine settings in your .claude/settings.json file - such as specifying the model, configuring effortLevel, or defining outputStyle - with a CLAUDE.md file that outlines your project’s context, including coding conventions and design tokens —similar to how prompt-as-code libraries structure reverse-engineered templates for agents.
Two settings worth configuring immediately are:
- Adding
npm run buildandgit statusto yourpermissions.allowlist to cut down on confirmation prompts. - Explicitly adding
.envfiles and any directories containing secrets topermissions.deny.
Wildcard matching is supported, so you can use patterns like Bash(npm run test:*) to allow entire test suites without listing every individual command.
To ensure consistency across your team, integrate these configurations with your version control system.
Using html-anything with Git and Dev Tools
Rather than relying solely on agent instructions to maintain code quality, enforce standards using hooks.
"Hooks give you consistent control over automated processes. Instead of hoping Claude Code remembers to lint your files, a PostToolUse hook runs Prettier on every HTML file."
For example, adding a PostToolUse hook in .claude/settings.json that pipes the edited file path through npx prettier --write ensures all HTML files modified by the agent are formatted immediately. Similarly, a SessionStart hook that runs git log --oneline -5 && git status --short gives the agent immediate branch and commit context.
For team environments, commit shared configuration files like .claude/settings.json, CLAUDE.md, and .claudeignore to your repository. This ensures consistent behavior across all team members’ setups and aligns configuration with development workflows.
By default, html-anything expects a CLAUDE.md file. If your team uses a different standard, like AGENTS.md, you can create a symlink with ln -s AGENTS.md CLAUDE.md. Alternatively, the experimental cc-agents-md tool can modify Claude Code to load AGENTS.md directly, though this requires more setup.
Known Limitations and Open Issues
While html-anything’s local-first design simplifies workflows, it does have limitations for advanced use cases. Key features still in development include a multi-template compare preview and a one-click handoff from Hyperframes to .mp4. Future additions, such as a browser extension for converting page selections into HTML templates and a history/version diff archive, are also on the roadmap. Until these features are officially released, avoid relying on them.
There’s also a known bug in Claude Code (Issue #52763, v2.1.107 as of April 2026) that causes the Preview panel to re-launch every time an HTML file is edited. While annoying, it’s not a dealbreaker. A bigger constraint is deployment: although the html-anything Next.js layer works on Vercel, the agent process itself must run locally to access your CLI session and filesystem. This makes fully remote or CI-only setups impractical.
To maintain performance, keep your CLAUDE.md file under 200 lines and use the /compact command to reduce context window degradation. Additionally, a .claudeignore file that excludes large directories like node_modules/ and dist/ helps the agent focus on relevant code.
Is html-anything Worth Installing?
Who Benefits Most from html-anything
If you’re someone who frequently creates HTML deliverables, html-anything can simplify your workflow significantly. It’s particularly useful for those already paying for Claude Pro ($20/month) or Claude Max ($100/month), and who regularly produce polished HTML outputs like landing pages, reports, social media visuals, or presentation decks. The tool offers tailored modes for different roles, as shown below:
| Role | Mode to Use | What It Replaces |
|---|---|---|
| Developer | prototype |
Manual setup for SaaS landing pages or dashboards |
| Product Manager | office |
Transforming CSV/Excel data into visual PM specs or OKR docs |
| Social Media Manager | social |
Creating high-resolution 2× PNG cards for platforms like X or Weibo without a designer |
| Presenter | deck |
Producing professional slide decks without traditional presentation software |
However, if you’re not already using Claude Code, Cursor, or one of the other eight supported CLIs, html-anything won’t add much value. It depends entirely on existing local CLI sessions to function. For those in the right roles and ecosystems, though, it can be a game-changer for producing final HTML outputs.
Setup and Usability: The Bottom Line
For users already embedded in the Claude Code ecosystem and regularly delivering HTML artifacts, html-anything is a practical addition. With 75 skill templates and nine output types, it reduces the friction of creating polished HTML at zero additional cost. Its ability to operate without an API key makes it even more appealing for those already authenticated via a supported CLI.
That said, if your workflow is heavily code-centric, remote, or CI-focused, or if you’re particularly cautious about token usage, you might want to hold off. The tool requires local execution, and some features - like comparing multiple templates - are still in development.
"Markdown is the draft. HTML is what humans read. Your local agent writes it." – nexu-io/html-anything
This quote captures the essence of html-anything’s utility, especially when your goal is to produce polished HTML as the final product rather than an intermediate step in a larger process.
FAQs
How does html-anything use my Claude Code login without an API key?
html-anything integrates seamlessly with your Claude Code login by leveraging the existing CLI session on your local machine. This approach removes the hassle of managing a separate API key and keeps the editor focused on a local-first workflow, making things more efficient.
What do I need installed for html-anything to detect my agent CLI?
To use html-anything with your coding agent, you’ll need to have one of the supported CLIs installed and logged in on your system. The tool automatically detects up to 8 different CLIs from your PATH. These include Claude Code, Cursor Agent, Codex, Gemini CLI, GitHub Copilot CLI, OpenCode, Qwen Coder, and Aider. Make sure your CLI session is already authenticated, as html-anything relies on your current login session to function.
Can I deploy html-anything to the cloud, or must it run locally?
html-anything is a local-first HTML editor that operates directly on your device through CLI sessions, eliminating the need for API keys. Its capabilities include exporting both HTML and PNG files, along with integration options tailored for local environments. The tool appears to focus exclusively on local workflows, with no evident support for cloud deployment. Its design prioritizes straightforward functionality and user control.
Member discussion